Renovate Builders, renowned for their experience in kitchen and bathroom upgrades, now applies their skill to ADUs. As professionals in garage to ADU conversions, they leverage their background in finishes, plumbing, and site project planning. This enables them to transform underutilized garages into contemporary, legal living spaces.
Custom Backyard Suite Construction Experts
In practical terms: An ADU is a self-contained dwelling on the same lot as a single-family property, featuring its own entrance, kitchen, bath, living area, and sleeping room. Renovating a cluttered storage capacity garage into a permitted ADU creates a secure, rentable unit or private suite for family use. This transformation converts a previously underutilized asset into a source of steady lease revenue and boosts real estate value.
For everyday use: Collaborating with professional ADU builders like Renovate Builders significantly decreases the learning curve for obtaining permits, upgrading codes, and making construction decisions. Renovate Builders positions itself among the top ADU conversion professionals and knowledgeable professionals serving the United States, as a leading choice for homeowners.
 Kirkland Garage Conversion Professionals
This article will explore the gains and ROI of such conversions, including permitting processes in California and broader U.S. contexts. It will also discuss structural and utility considerations, design and finish selections, the selection of remodelers, cost estimates and financing options, and realistic timetables for garage-to-ADU projects.
Key Takeaways
- In practical terms: Renovate Builders expands remodeling specialized knowledge into garage-to-ADU conversions.
- From a practical perspective: An ADU is a separate, fully equipped living unit on the same lot.
- Converting a garage can add rental earnings and raise real estate value.
- Qualified ADU builders streamline permitting and code compliance.
- The article outlines expenses, design, approvals, and timelines for residents.
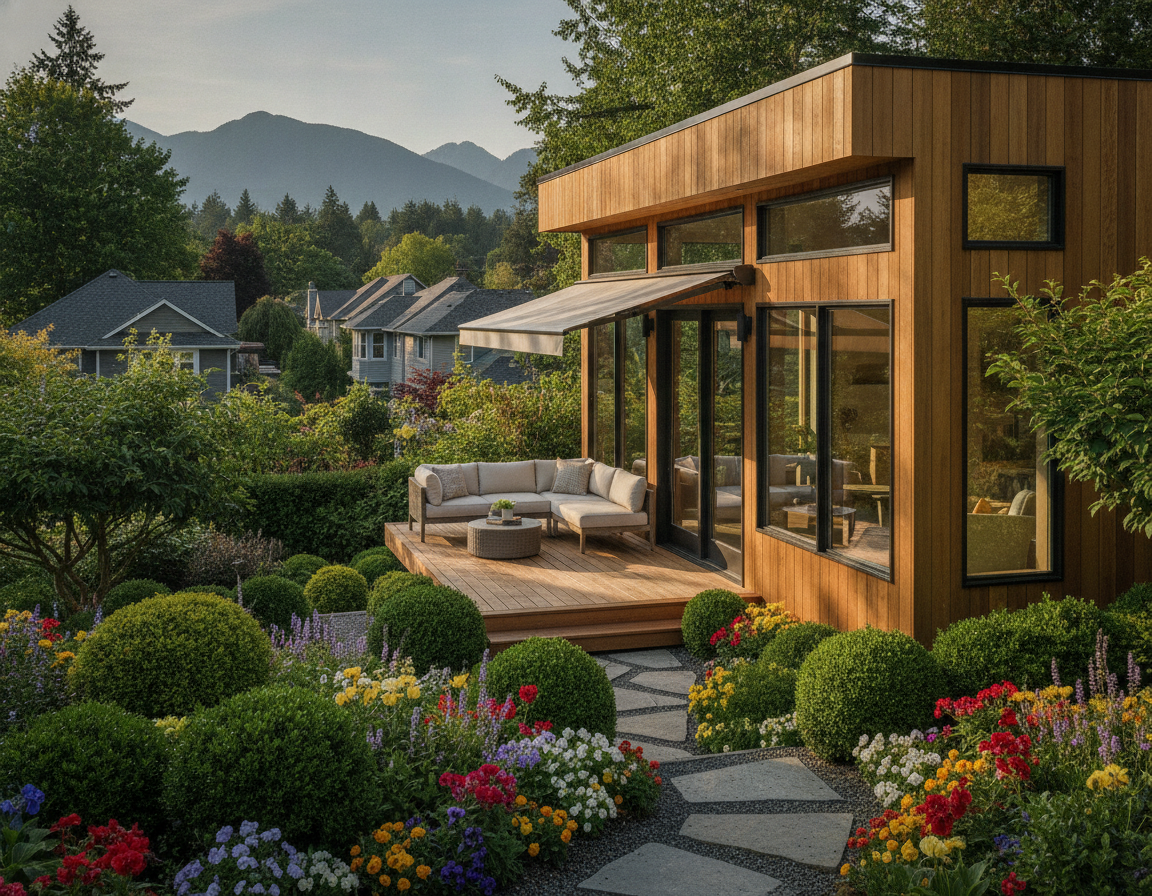
Why Convert Your Garage Into An ADU: Benefits And ROI
For everyday use: Transforming an unused garage into an accessory dwelling unit can revolutionize your property’s practicality. In practical terms: A meticulously planned conversion not only creates legal habitable area but also accelerates income generation. It adds worthwhile square footage without the expense of a full new building. Residents are guided by professional ADU builders and garage conversion professionals, helping secure the project aligns with their budget and aspirations.
For Everyday Use: Financial Advantages And Rental Earnings
Garage ADUs, when permitted, can generate rental earnings that offsets mortgage payments or offers a steady cash flow. In many California cities, these units command rents ranging from $1,800 to $2,500 monthly, influenced by size and high-caliber of finishes. ADU conversion specialists can deliver realistic rental projections and estimate the remodel’s payback period.
Compared to building from scratch, garage conversions are quicker. From a practical perspective: This brevity leads to faster occupancy and quicker returns on investment. Affordable conversion services employ budget-conscious products and phased enhancements to expedite the project timetable.
Increased Home Value And Appraised Square Footage
Adding a permitted ADU boosts your home’s appraised square footage and can enhance future sale value. The legal addition of residential space often commands a higher price per square foot than unpermitted areas. ADU conversion professionals offer guidance on documenting the new unit for appraisal purposes.
In practical terms: Converting a garage typically circumvents additional lot coverage and may encounter fewer setback restrictions than a new build. For everyday use: This simplifies the permitting process and preserves yard space while increasing usable interior area.
Realistic Uses: Guest Suite, Home Office, Multi-Generational Living
From a practical perspective: An ADU serves various purposes. It can function as a private guest suite, a dedicated property office, a studio for creative pursuits, or a residence for aging parents. From a practical perspective: Its versatility allows residents to adapt to changing life circumstances and financial objectives.
Expert builders design ADUs with efficient floor plans, incorporating a kitchenette, bathroom, and living area within a compact footprint. For everyday use: ADU conversion experts focus on maximizing storage and natural light to improve ease in these smaller spaces.
For Everyday Use: Community Gains And Economical Housing Impact
For everyday use: Integrating ADUs into neighborhoods adds gentle density, helping alleviate local housing shortages while preserving community character. State initiatives, such as those in California, have streamlined regulations to encourage more accessory units.
From a practical perspective: Affordable ADU conversion professional offerings enable residents to create cost target-friendly rentals, expanding housing alternatives. In practical terms: Garage to ADU conversion professionals and experienced ADU conversion professionals are instrumental in delivering units that meet regulatory requirements, tenant priorities, and community objectives.
From A Practical Perspective: Project Planning Your Garage Conversion: Approvals, Codes, And Local Rules
Transforming a garage into a legal, habitable ADU necessitates thorough research and a well-thought-out strategy. For everyday use: Building departments across cities and counties impose distinct regulations. From a practical perspective: It is imperative to initiate contact early to circumvent the possibility of incurring meaningful expenses later. For everyday use: Engaging with ADU conversion experts can facilitate this process, making certain of the project remains on schedule.
For Everyday Use: Understanding State And Local ADU Laws
State legislation influences how cities coordinate ADUs. In practical terms: California’s AB 68 and similar laws expedite approvals and relax certain restrictions. Despite this, local ordinances dictate specifics such as size constraints and design criteria. In other states, the allowance for ADUs varies, with different stipulations for setbacks, height, and square footage.
Seeking guidance from local preparation staff or collaborating with renowned ADU contractors well-versed in your area’s regulatory standards is advisable. These specialists can differentiate between state-mandated and locally specific rules. This distinction is critical for avoiding unexpected concerns during the plan review phase.
Permit Workflow Overview: Application, Plan Review, Site Inspections, Certificate Of Occupancy
For everyday use: The typical workflow involves preparing architectural plans, submitting a permit application, and awaiting plan review. The building department will then outline necessary modifications before issuing building permits.
Site inspections are conducted at critical stages: foundation or slab work, mechanical and electrical rough-in, insulation, and final finish selections. For everyday use: The undertaking is deemed complete upon inspector approval and the issuance of a Certificate of Occupancy. In practical terms: Engaging expert ADU builders can expedite this workflow, as they are well-acquainted with inspection protocols and common code challenges.
Common Code Improvements: Egress Windows, Insulation, Ceiling Joists, Moisture Barriers
Garages often demand upgrades to meet residential building regulations. Egress windows or compliant exit paths are critical for sleeping areas. From a practical perspective: Insulation and drywall must adhere to residential benchmarks for thermal and fire safety.
For everyday use: Ceiling joists may need reinforcement to support insulation and drywall. In practical terms: Moisture barriers between the slab and new floor coverings are essential to prevent mold and meet construction codes. For everyday use: Electrical, plumbing, and HVAC systems typically necessitate updates. In practical terms: An experienced ADU conversion firm will incorporate these enhancements into permit-ready plans.
Setbacks, Parking Requirements, And When They May Be Waived
From a practical perspective: Many conversions remain within the garage’s original footprint, adhering to setback regulations. For everyday use: Local regulations vary on whether expanding or altering the footprint triggers additional setbacks. Parking requirements have been relaxed in many areas, with California leading the way in reforms that ease parking near transit corridors.
It is essential to confirm parking and setback requirements with the building department before finalizing plans. Engaging with top-rated ADU contractors and professional builders can deliver insights on when waivers or exceptions might apply and assist in preparing arguments to support them during review.
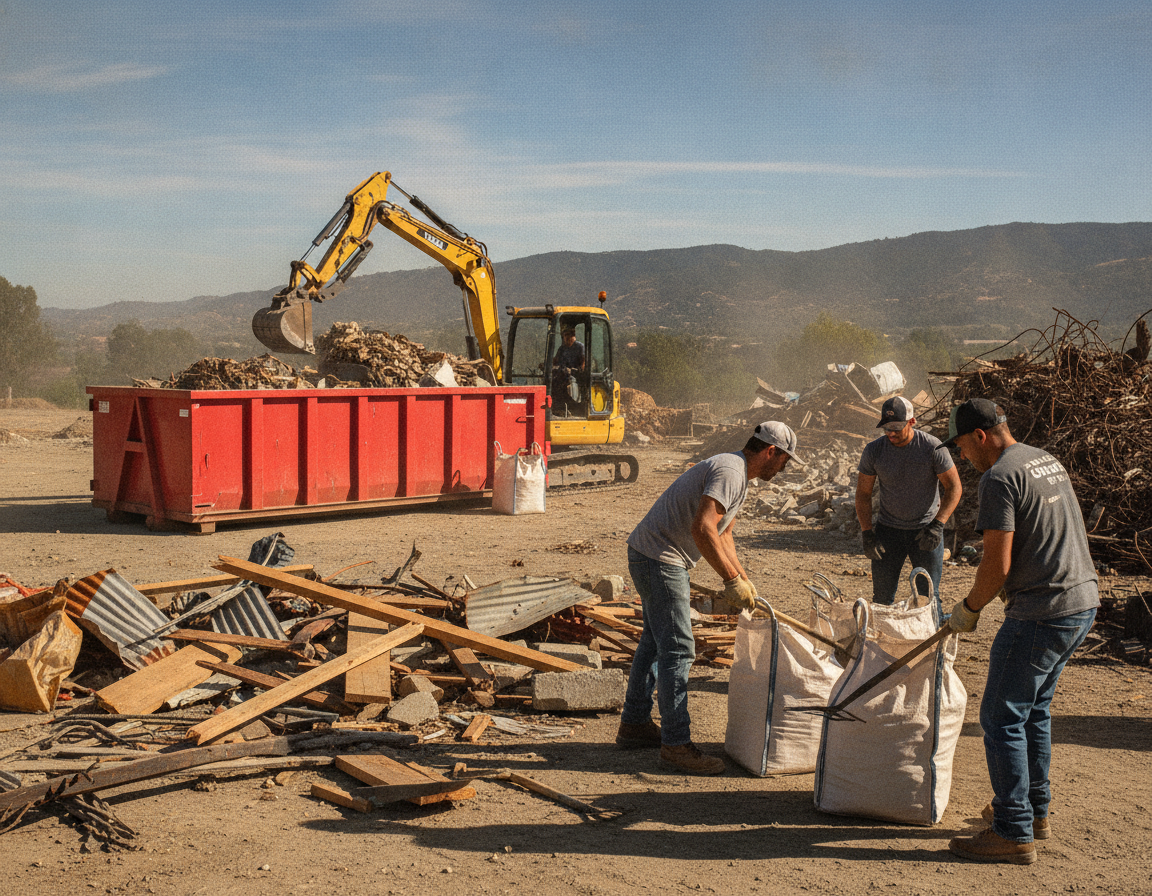
In Practical Terms: Assessing Your Garage: Structural, Foundation, And Utility Considerations
Before embarking on a garage conversion, it is imperative to conduct a thorough assessment of its structural integrity and utility systems. In practical terms: This initial evaluation is critical for avoiding unforeseen expenses and making certain of a smoother permitting process. In practical terms: Engaging experienced ADU conversion professionals at the outset can help uncover any hidden structural issues and establish realistic project timetables.
From A Practical Perspective: Evaluating The Existing Foundation And Possible Slab Work
For everyday use: Garage slabs, often designed for vehicle storage capacity, may not be suitable for residential use. From a practical perspective: It is vital to inspect for any signs of damage, such as cracks or sinking, and assess the slab’s thickness.
For everyday use: Depending on the condition, slab repairs, underpinning, or even a complete replacement may be necessary to meet building codes and support the added weight of residential features. From a practical perspective: Enhancements like moisture barriers and proper grading can significantly impact both cost and undertaking duration.
In Practical Terms: Structural Upgrades: Framing, Roof, And Load-Bearing Considerations
When converting a garage, the framing may require reinforcement to accommodate insulation, drywall, and new openings. A thorough examination of ceiling joists, wall studs, and roof rafters is necessary to help secure they can handle the additional load.
From a practical perspective: Modifications such as door openings or the addition of windows may necessitate engineered headers or new load paths. Exterior surface treatments may also need to be updated if the garage is close to real estate lines and must comply with local rules.
Utility Planning: Electrical Panel Enhancements, Plumbing, HVAC, And Separate Meters
In practical terms: Early planning for plumbing is vital, including routes for kitchen and bathroom lines. From a practical perspective: Determine the sewer or septic connection points and the path for hot and cold water lines.
From a practical perspective: Electrical enhancements, such as panel upgrades or the addition of subpanels, may be required. Discussing the possibility of separate meters with your utility provider can help balance upfront project costs against the advantages of easier tenant billing if renting.
HVAC alternatives range from ducted systems to mini-splits or packaged units. For everyday use: ADU remodel experts can deliver guidance on efficiency, local incentives, and space constraints.
For Everyday Use: Usual Schedule Factors Based On Garage Condition
The project timeline is largely influenced by the garage’s initial condition. For everyday use: Garages in good condition can be converted more quickly, while those requiring substantial repairs or structural work will take longer. Standard conversions typically take seven to nine months from permit to Certificate of Occupancy.
Factors such as permit review time, inspection frequency, and utility scheduling also play a role in determining the remodel schedule. Qualified ADU builders manage the coordination of trades, site inspections, and paperwork to help secure the remodel stays on schedule.
Design And Floor Plan Ideas From Expert ADU Builders
Optimal design improves the perception of area in a garage-to-living-space conversion. Professionals in ADU on-site work focus on designs that are both compact and multifunctional. They ensure that the kitchen, living, and sleeping areas are seamlessly integrated into an open configuration. This method limits the use of room while maximizing everyday usability.
Designers often advocate for studio-style one-bedroom floor plans. For everyday use: These configurations incorporate built-in organized storage and foldaway furnishings to maintain a well-defined flow. This design choice maximizes the use of area, making the area feel more expansive.
In practical terms: Accessibility is a essential factor in ADU design, adding both value and livability. In practical terms: Features such as zero-step entries, wider doorways, lever takes care of, and curbless showers improve the unit’s appeal. These elements support aging-in-place and multi-generational living, making the ADU more marketable and adaptable over time.
The choice of finish selections should strike a balance between durability and aesthetics. Vinyl plank flooring, efficiency-focused HVAC systems, mid-range cabinetry, and dependable appliances are ideal for balancing rentability and resale value. In practical terms: Economical ADU conversion services can assist in selecting finish selections that are both low maintenance and visually appealing.
For everyday use: Natural light is critical in transforming small spaces. In practical terms: Egress-compliant windows, strategically placed skylights, or light tubes can significantly improve daylight without compromising privacy. From a practical perspective: Helping secure proper egress not only meets code requirements but also strengthens safety, a priority for builders and inspectors.
Below is a compact comparison to help choose design priorities based on goals.
| For everyday use: Design Goal | Key From a practical perspective: Features | In practical terms: Benefit | Recommended In practical terms: Specialist |
|---|---|---|---|
| Maximize usable area | Open-plan floor plan, wet-wall bathroom, built-in organized storage | Feels larger, lowers plumbing cost | qualified ADU builders |
| Universal access | Zero-step entry, wide doors, curb-free shower | Supports aging-in-place, widens market | For everyday use: garage to ADU conversion professionals |
| For everyday use: Cost-effective finish selections | Vinyl plank, mid-tier cabinets, energy-efficient HVAC | Good ROI, low upkeep | In practical terms: ADU remodel experts |
| From a practical perspective: Daylight and safety | Egress windows, skylights, light tubes | In practical terms: Better ease, code compliance | budget-friendly ADU conversion solutions |
Choosing The Right Team: Garage To ADU Conversion Experts
For everyday use: The selection of a remodeler is essential for the success of any garage-to-ADU transformation. Opt for firms that exhibit fully explained project coordination, recent converted-garage project projects, and consistent communication throughout the permitting and building phases. A proficient crew minimizes unexpected problems and ensures projects are completed within the anticipated timeframe.
For Everyday Use: Qualities To Seek In ADU Conversion Specialists And Highly Rated ADU Remodelers
Seek out contractors with a proven performance history in garage-to-ADU conversions and a portfolio of effective projects. Prioritize crews that deliver itemized proposals and explain the factors influencing costs, such as foundation work, utility relocation, and interior surface treatments. In practical terms: A history of timely completion and positive client feedback are indicative of a reliable contractor.
From A Practical Perspective: Credentials, Licenses, And Local Permitting Hands-On Knowledge
For everyday use: Help secure the remodeler holds valid state licenses and current insurance protection. From a practical perspective: Confirm their familiarity with your local building department and adherence to regional ADU rules, including recent California laws if applicable. For everyday use: Building professionals who take care of plan submissions and secure site inspections can save time and limit the risk of permit-related delays.
Questions Worth Asking Prospective Expert ADU Builders And Seasoned ADU Conversion Professionals
Inquire about their recent garage-to-ADU undertakings and their success rate in obtaining approvals. Request detailed timelines and typical cost contingencies. For everyday use: Ask how they address unforeseen structural or utility problems and whether they arrange for separate meters, HVAC, and plumbing upgrades. Inquire about guarantee provisions and their workflow for selecting and supervising subcontractors.
In Practical Terms: Checking References, Portfolios, And Undertaking Schedules
Request references from recent clients and review before-and-after photos. Read online reviews and confirm completion dates against initial estimates. Evaluate multiple bids to determine any outliers and insist on a detailed, itemized contract to prevent scope creep. In practical terms: Selecting the best ADU conversion firm involves balancing cost, proven finished results, and effective permitting processes.
A final tip: initiate conversations with several well-reviewed ADU contractors early on. From a practical perspective: This allows you to assess their responsiveness and project vision. The ideal team will guide you through the permitting workflow, oversee the trades, and safeguard your investment from unforeseen expenses.
For Everyday Use: Cost Estimates, Budgeting, And Economical ADU Conversion Professional Offerings
For everyday use: Transforming a garage into an ADU is a savvy move to expand habitable area without the hefty expenses of building anew. such undertakings typically fall between $100,000 and $180,000, in California. Across the nation, the primary factors influencing costs remain consistent: foundation work, structural framing, utility enhancements, and interior decoration.
For everyday use: Foundation repairs or slab replacements can significantly alter a project’s cost. Upgrading electrical panels, installing new plumbing risers, and adding HVAC systems add both expense and time. The final tally is heavily influenced by the selections made in kitchen and bathroom upgrades, as well as the finish selections selected.
Unexpected concerns can escalate expenses. Problems like rotten framing, asbestos, or expansive soil demand additional work not initially accounted for. A thorough site assessment by ADU renovation specialists helps mitigate these surprises, keeping contingency plans realistic.
From a practical perspective: Compared to building from scratch, garage-to-living-space conversions are generally more economical and quicker. Reusing the existing footprint limits framing time and the need for new foundation permits. From a practical perspective: Typically, a conversion takes around 7–9 months. new building remodels often take longer and are more costly due to site preparation and permit obligations, in contrast.
From a practical perspective: Effective budget management begins with prioritization. From a practical perspective: Phased improvements enable for initial code and utility work, followed by the addition of higher-end finish selections later. For everyday use: Opting for mid-range building materials can appeal to renters and buyers without breaking the bank.
For everyday use: Seeking clear, itemized bids is essential. The top ADU conversion company will provide detailed estimates and open project-amendment policies. From a practical perspective: This clarity helps avoid surprises and helps secure spending stays on track with project milestones.
Financing options cover house equity lines of credit, upgrade loans, on-site work loans, or cash-out refinancing. It’s wise to consult with local banks or credit unions familiar with house improvement loans. In practical terms: They can offer insights tailored to your area.
For everyday use: Expected returns come from rental income and increased property value. From a practical perspective: Rental cash flow can offset loan payments over time. In practical terms: Consulting with an accountant or property agent can help model local rent rates and property appreciation.
| Cost In practical terms: Component | Typical In practical terms: Range | Impact In practical terms: on Budget |
|---|---|---|
| From a practical perspective: Foundation / Slab | From a practical perspective: $8,000 – $40,000 | For everyday use: High; can change project scope |
| In practical terms: Structural Framing & Roof | For everyday use: $10,000 – $50,000 | For everyday use: High; affects timetable and inspections |
| Electrical & Panel Upgrades | From a practical perspective: $3,000 – $12,000 | In practical terms: Medium; may demand utility coordination |
| From a practical perspective: Plumbing & HVAC | From a practical perspective: $5,000 – $25,000 | Medium; critical for habitability |
| In practical terms: Kitchen / Bath Surface treatments | For everyday use: $10,000 – $40,000 | Medium; large variance by selection |
| From a practical perspective: Building permits & Plans | From a practical perspective: $2,000 – $10,000 | For everyday use: Low to medium; depends on jurisdiction |
| Contingency | From a practical perspective: 10% – 20% of remodel | Critical; covers unforeseen concerns |
To oversee project costs effectively, engage qualified ADU conversion experts early. They can suggest cost-saving strategies, recommend dependable subcontractors, and propose phased schedules. From a practical perspective: Budget-friendly ADU conversion professional offerings are available when crews integrate effective design with trusted trade partners.
In practical terms: Prospective firms should be asked about their background with local conversions, timetables, and warranty terms. From a practical perspective: The best ADU conversion firm will offer references, well-defined contracts, and realistic schedules. From a practical perspective: ADU upgrade specialists focused on conversions deliver functional solutions for tight budgets and quicker occupancy.
Final Thoughts
Transforming a garage into an ADU is a strategic move, turning an underutilized area into a legal, habitable area. This transformation not only enhances home value but also opens up the possibility of generating rental earnings. For everyday use: It caters to diverse requirements, from guest accommodations to full-fledged rental apartments. it significantly contributes to the local housing stock, when executed correctly.
For everyday use: The success of such a project hinges on meticulous project planning. It is vital to obtain the necessary permits, address structural and foundation concerns, and plan for utility upgrades. Collaborating with Garage To ADU Conversion Experts and seasoned ADU builders helps secure compliance with building codes and the creation of effective designs that meet market benchmarks.
In practical terms: Engaging seasoned ADU conversion professionals and reputable ADU remodelers is vital for a smooth permitting and on-site work process. In practical terms: Businesses like Renovate Builders offer a blend of interior design expertise and properly authorized contracting. For everyday use: They help navigate through local rules, helping secure a hard-wearing and compliant outcome. From a practical perspective: It is advisable to spending plan accurately for foundation work, utility installations, and finishing touches to prevent holdups and cost overruns.
a garage conversion can be completed in approximately 7–9 months, with careful project planning and the support of a skilled project group. For everyday use: This timeframe often leads to substantial long-term returns through rental earnings and increased real estate value. Property owners looking for the most reliable ADU conversion solutions should focus on the credentials and track records of expert ADU builders and experienced ADU conversion specialists.
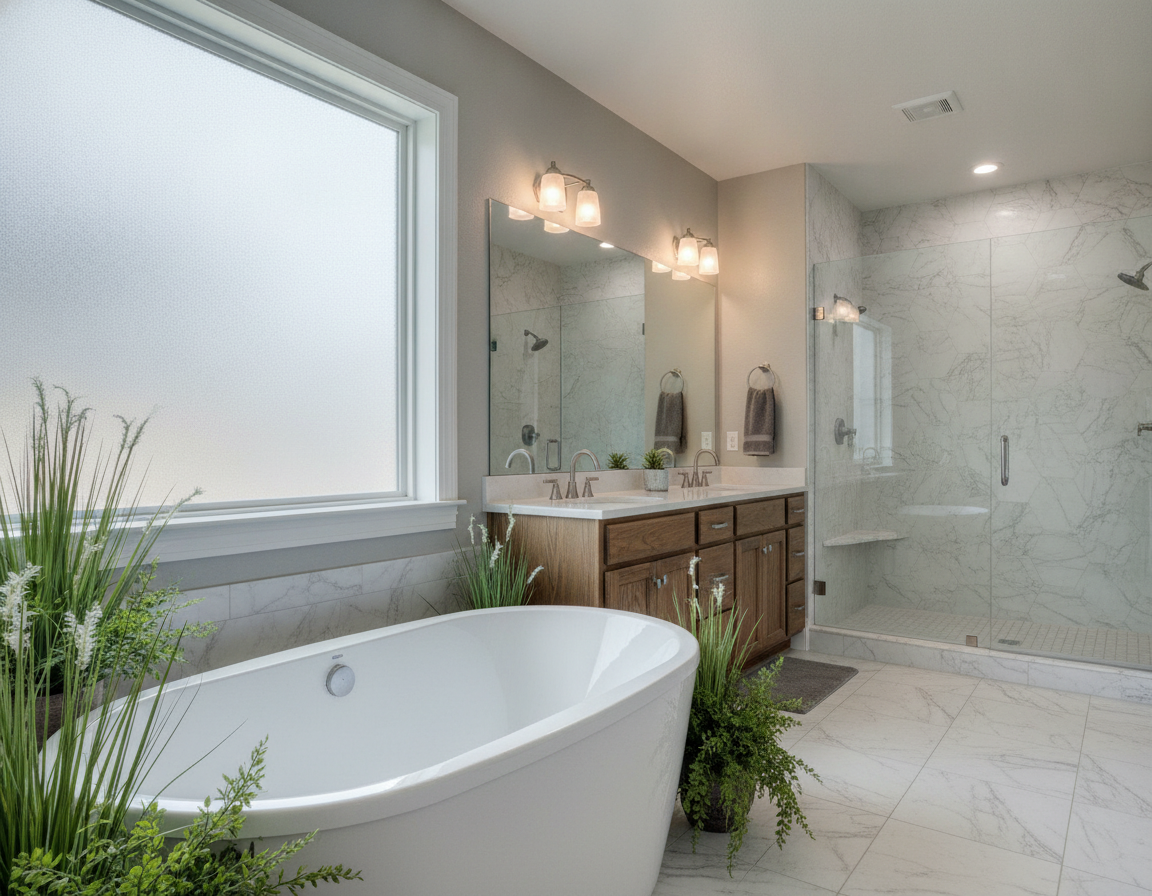
Related: Bathroom Remodeling Specialists In Redmond Wa: What You Should Know